


")


Learn better with video? Watch the tutorial here on how I cull my images using PhotoMechanic and Lightroom!
I remember when I first started out in photography, I didn’t know what culling meant. Once I found out what it was, I was culling pictures in Lightroom at the speed of molasses, and probably have even tried to do it in camera a time or two on those first weddings I shot.
Culling can be a nightmare if you don’t have a system for it. Most of us take A LOT of pictures at a wedding or session, so it’s important to nail down a system down we can follow every single time to remain consistent and save our sanity.
Part of your marketing efforts should be blogging and posting pictures to social media, whether it be Facebook, Instagram or both. Since different parts of your workflow require different sized images (Your album spreads are going to be much higher resolution than your Facebook posts), it’s important to export them and cull them separately.
To read about how to set up export presets, and grab my free guide on what settings to use, read this post: How to Create Export Presets in Lightroom
My culling system is a 5 part rating system as follows:
- Main gallery – 1*
- Album – 2*
- Blog – 3* + COLOR
- Facebook – 4*
- Portfolio- 5*
This is how the system works:
Step 1: Culling for the Client Gallery (1*)
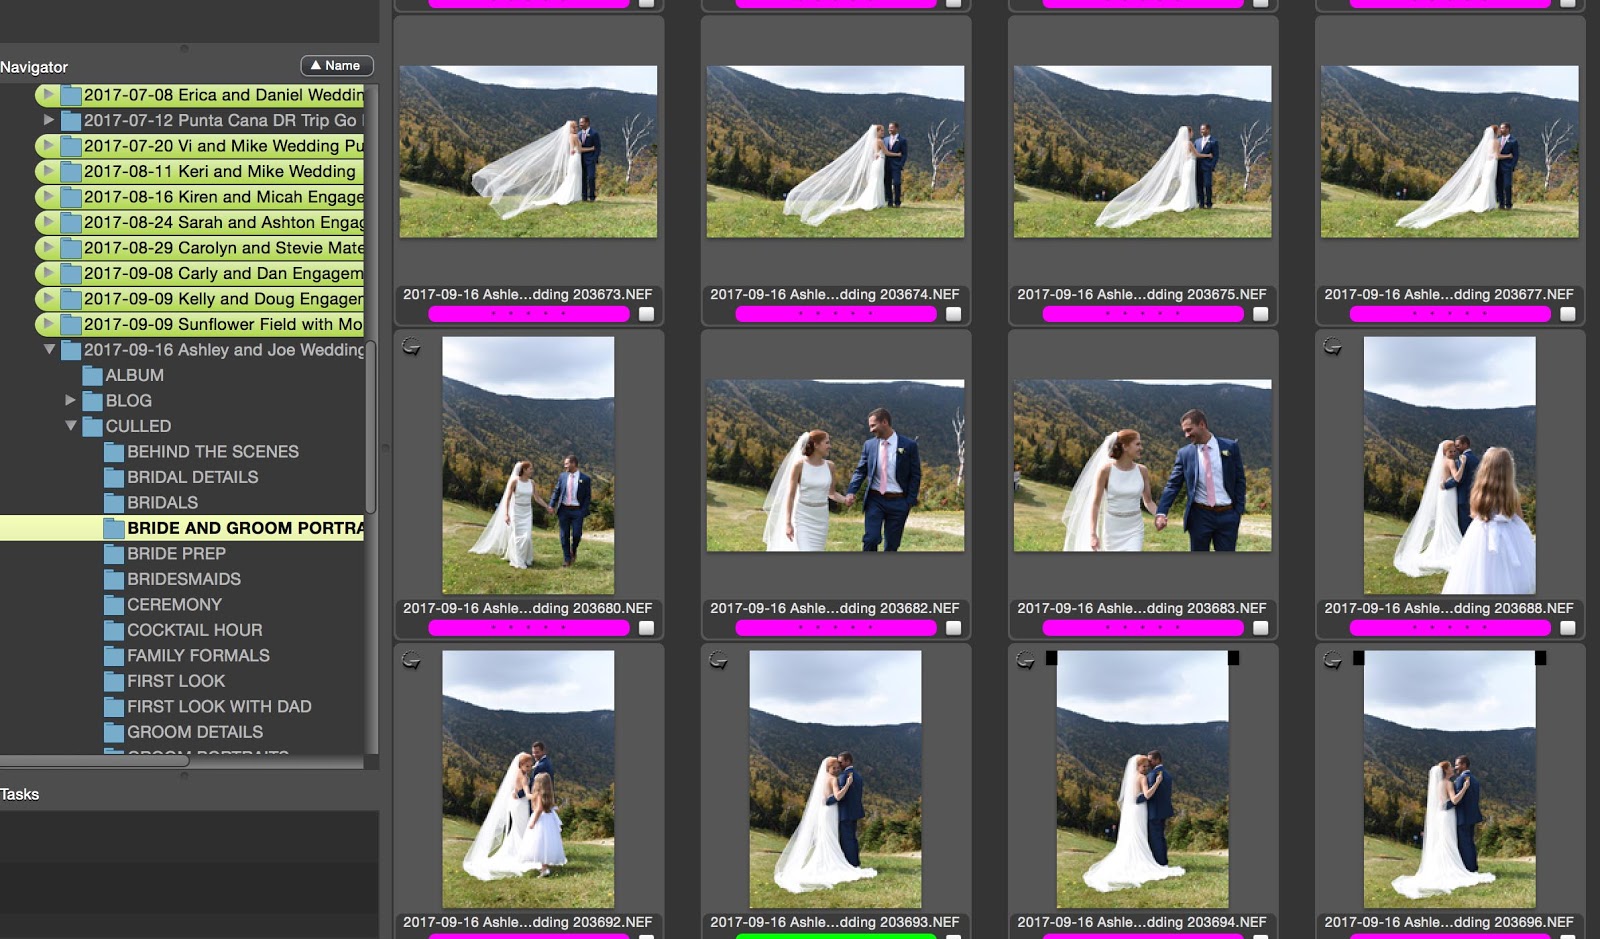
I recommend a 5 point culling and rating system for your images. Within PhotoMechanic (the software I use for culling images at the same speed my brain can think), I use the number pad to label everything PINK that is going to go into my client’s gallery.
Once I have all my gallery photos selected, I turn “off” any photos that didn’t make the initial cull and drag them into a new subfolder on my hard drive to be imported into the Lightroom catalog.
To see how I set up my hard drive folders, read this post: How to Save Time on Every Photo Session
At this point, I import them all into Lightroom, where I do the rest of the culling.
Once in Lightroom, I select all of them and label them 1*, using the “1” on the keyboard. You can also do this in PhotoMechanic, but sometimes the rating doesn’t transfer if your settings in PhotoMechanic aren’t set up properly.
So once you have everything imported, it’s time to cull for the blog. I do this BEFORE my 2* album culls, and I’ll tell you why when I describe the album cull below!
Step 2: Culling for the Blog – 3*
Once all my photos are done importing, I cull for the blog using one of the color labels in Lightroom. I use the “8” key on my keyboard to label all my blog photos green. I do this because my process is to only edit the blog photos first. Then, since all of them are labeled green, when myself or my editor go to edit the whole gallery, it’s much easier to see all the green labeled images to sync the edits to them. If I had only labeled them with a star at this point, it would be much more difficult to find what to sync the edits to.
Once those are culled and labeled green, I also label them 3* because this is important for my export process. When this cull is complete, then I move on to doing a 4* cull for social media.

Step 3: Culling for Social Media – 4*
After the blog images are culled and labeled 3*, I do a cull even more niched down for pictures that are worthy of going on Facebook and Instagram. Before you begin, make sure you’re viewing only your 3* images by toggling and filtering your grid view on your home screen.
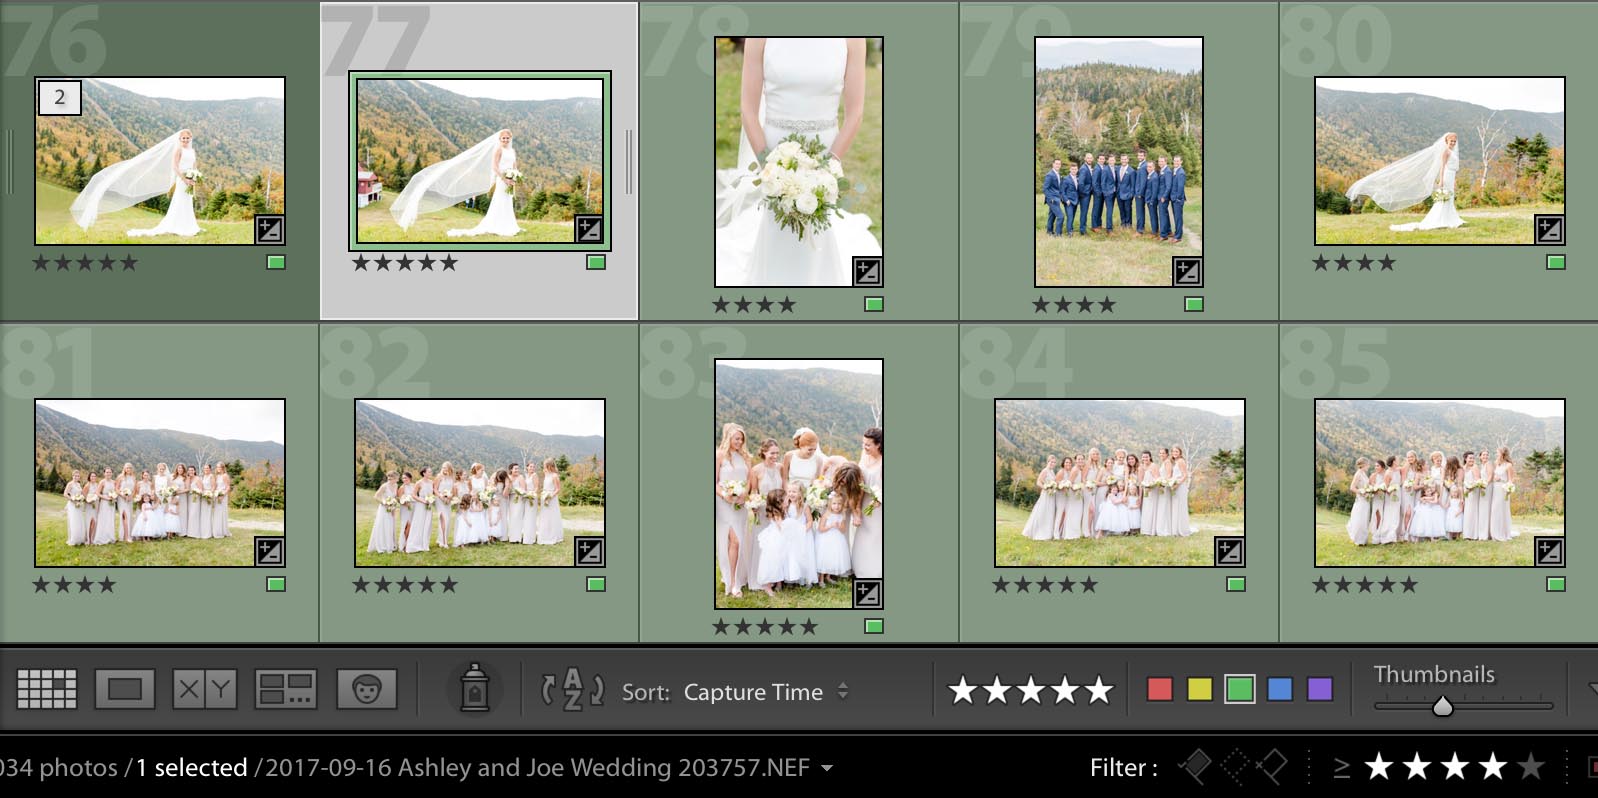
The system here is that the higher the rating, the better the image. Anything going on either of these platforms gets a 4* (using the “4” on my keyboard). I aim for around 50-75 pictures for this range. I’d prefer less, but always have a really difficult time narrowing it down!!
Step 4: Culling for the Portfolio – 5*
Once I have my 4* images selected, I turn off anything below this, and then finally, culling from those 4* images, I rate any portfolio worthy images for website and promo images with a 5* rating, using the “5” on my keyboard.
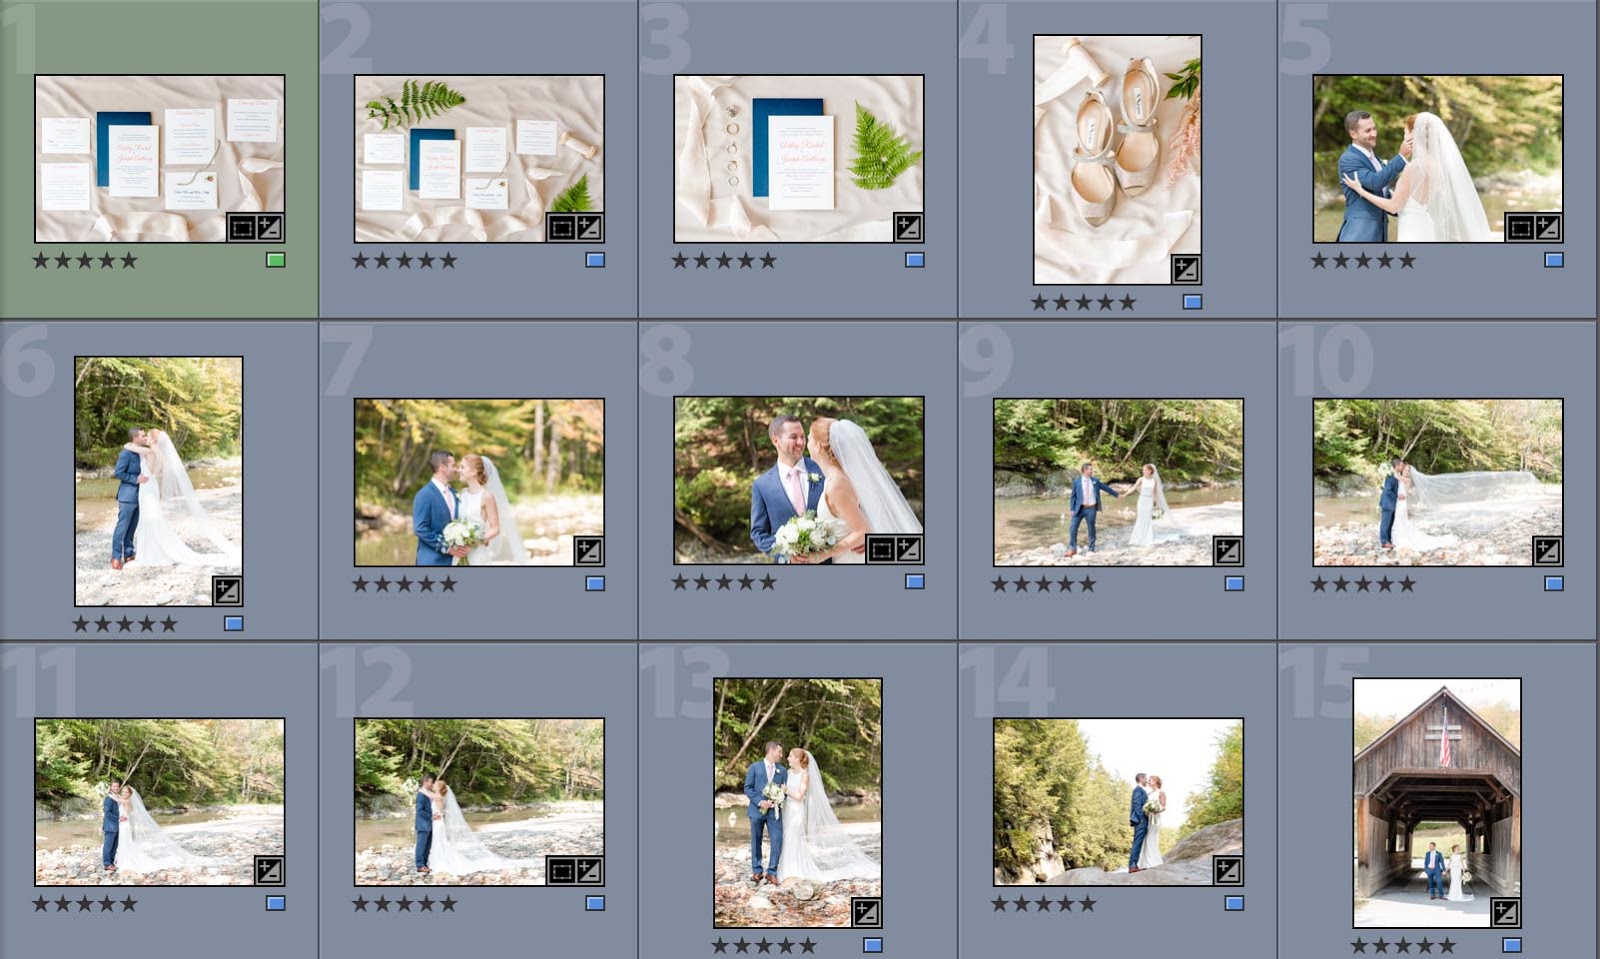
Step 5: Culling for the Album – 2*
Once I have all these culling rounds done, I go back to cull for the album. Honestly, I sometimes do this after I get my images back from my editor, because the only thing different between these and the blog images, for me, are additional family photos, and a variation of horizontal and vertical images of the same pose or detail so that I can play around with layouts!
Step 6: Use your export presets to export each rating separately.
Once everything is complete, I edit for the blog (so the 3* images). Once I’m done editing, I send everything else over to my editor to complete the rest of the edits!
Once my editor has the images, I export using the presets I talk about in this post here: How to Create Export Presets in Lightroom
While it seems like an overwhelming amount of culling, it’s actually just the opposite!! This streamlines everything for me, and I know it can for you, too!
Pro tip:
I highly highly highly recommend doing your culling in 5 rounds like this, instead of trying to do one giant cull and choosing each images’ rating in one big round of culling. I’ve heard people say to only do one round of culling, and it is actually way less efficient! Our brains are not meant to think on 5 different wavelengths at once. I’ve tried it and found it nearly impossible to think of a 1-5 rating at the same time for each image. (“Should this be a blog image or a portfolio image? Or go in the album?”) It would take me a million years to cull like that. So instead, cull all your 1*, then all your 3*, then 4*, 5*, and finally back to 2*.
And there you have it! My complete 5-part culling system for photographers! Reply in the comments below if you plan on using this on any of your upcoming sessions and let me know how it goes!


")


+ show Comments
- Hide Comments
add a comment