


")


About a year ago, I started getting very frustrated with the number of task management programs and paper to do lists that I had going for my business. I felt as though I was spending more time trying to organize my to do’s that I actually was completing them!
Enter, Asana. After a few weeks of learning and implementing the features of this program, I can safely say that Asana is my go-to task management software for my business. Now, I use Asana for almost everything – storing workflow templates, assigning tasks to my team members, color coding & scheduling my content calendar, and so much more.
However, there is one catch. You may end up spending more time searching for projects or forgetting unassigned tasks if you don’t take the time to set it up correctly. Just like any system or workflow, it takes a little work on the front end (+ongoing maintenance) to keep everything running at its highest performance and efficiency. Today, I want to share 10 ways to save time with Asana based on my experience using the software for my business.
#1 – Set Up Templates for Frequent Projects or Workflows
Templates are one of the biggest life-savers for your business. Whether it is as simple as a checklist for writing and publishing a blog post or as complex as a template for your entire editing workflow, I urge you to set them up. That way, when you know it is time to complete an identical project or workflow, all you have to do is duplicate the template. It is your own internal plug and play system that will save you hours of re-writing your to-dos.
#2 – Add Tasks to Multiple Projects
One of my favorite features in Asana is the ability to add a task to multiple projects. This allows you to create the task once and see/access that task within different project windows. For example, when I am adding to my blogging brainstorm board, I also add those same tasks to my content queue board so I can view them in more than one place. Here is a screenshot of how this done:
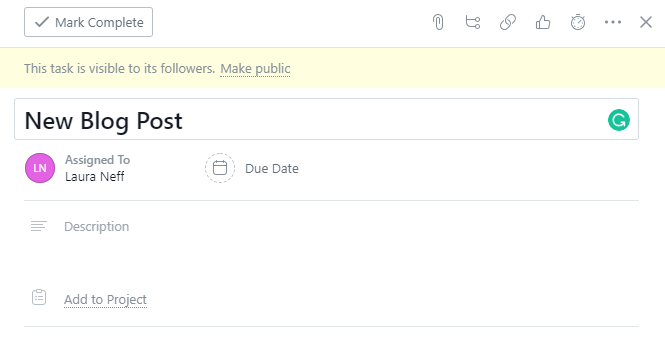
You will see here in this screenshot the area below the task where you can “Add to Project”. When you click this icon, Asana will allow you to add the first project. Then, let me show you how to add the second one.
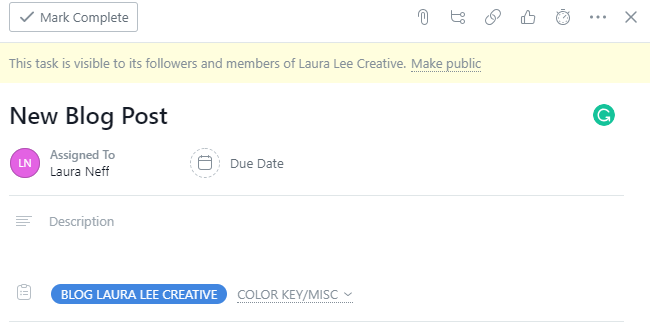
In this second image, you will see that I selected “Blog Laura Lee Creative” as my first project. Directly to the right of this is a + sign. This is where you will add your desired second project.
#3 – Set up a Project for Repeating Tasks
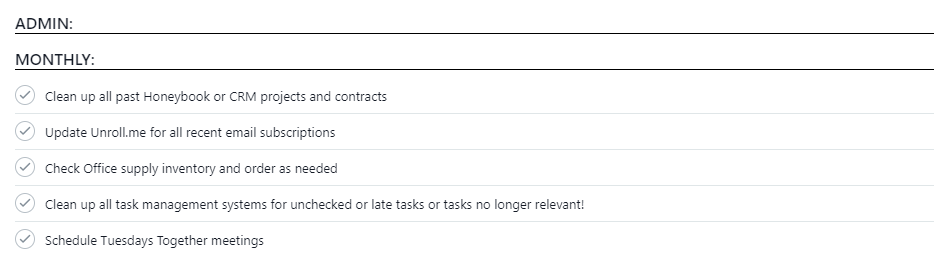
My “Repeating Tasks” project includes daily, weekly, monthly, and yearly repeating tasks for things like posting to Facebook (daily) or cleaning up Honeybook project/inquiries (monthly) or paying taxes (yearly). Within this project, I split up my tasks into sections based on what category they apply to. For example, I have a section for content, admin, finances, etc. I love using this project to keep track of things in my life that need to happen on a regular basis. It removes the guesswork from me to do list and stores it in one easy to access place.
Here’s an example of my monthly admin tasks:
Here’s an example of my monthly content tasks:
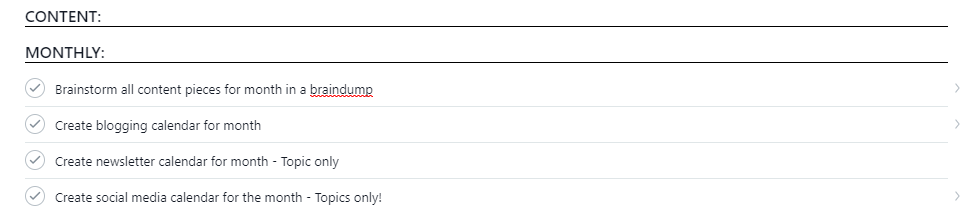
I took off my due dates on this image, but typically, this list is set up to repeat monthly tasks on a certain day of the month, weekly tasks on a certain day of the week, and so forth.
#4 – Set Due Dates to Everything
Due dates are ESSENTIAL. When you create a task in Asana, you are not required to create a due date (or even assign a project). So what ends up happening is, the task gets lost or you end up creating a duplicate of the task because you forgot it was already on your list. Save yourself the time and the “am I going crazy” moments and assign due dates, every time.
And best of all, you will never have to go into each individual project to view current tasks, just click on “My Tasks” and you will see everything that’s due (in chronological order) in one place!
#5 – Use Colored Tags
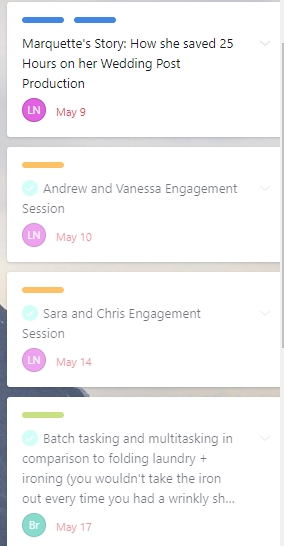
Color tags add another layer of organization to your Asana board. They allow you to easily visualize the category a task belongs to, especially when your board starts to build up with 10, 20, 50 projects! One example of this is assigning color tags to the different blog categories in your content calendar. This is a life-saver for me. I know that I write blogs in five different categories. Therefore, each blog I write in that category gets assigned its own unique color. For example, I write blog posts in a category called “Tips for Creatives”. When I brainstorm or schedule a post in this category, every card gets a Pink color tag with the label “Tips for Creatives”. That way, it is easy for me or any of my team members to see what blog category the card belongs to – without having to go into the card and see all the details.
Here is an example of how I use color tags. In the image of the left, you will see three different color tags at the top of the card. Blue = Blog Laura Lee Creative, Orange = Blog Laura Lee Photography, Green = Newsletter.
#6 – Use the Search Bar
The search bar is your best friend in Asana. Use the search bar to find any task or project even if you can’t find where you put it! It is a simple and easy way to feel in control of all your to do’s without wasting time searching around your projects or boards.
#7 – Create a Business Roadmap Board
When I started growing my team, I found that the Business Roadmap Board was essential for our team so that everyone was on the same page. This is where I house all my frequently used links, logos, affiliate links, opt-in downloads, testimonial documents, and more! This provides structure for everyone on my team, including me. Instead of searching through my computer or Google Drive folders or email, this is the first place I check for a frequently used item in my business.
Here is an example of a few headers in my Business Roadmap Board.

#8 – Write Procedures on Task and Project Templates
Don’t underestimate the importance of the description box. I use this box to write out procedures and notes when I initially create it. That way, when I (or my assistant) return to the task on another day, we don’t waste time trying to figure out our next steps because they are all right there. This is also a great place to begin work on an SOP for your business. Braindump here and then you can format the standard later!
*I just hired an intern 1 day a week and this has come in HUGE handy for training her! I just tell her where to look in Asana and she’s able to follow the procedure step by step with minimal questions. Any questions she does have, I update the procedure so it’s even better for next time!
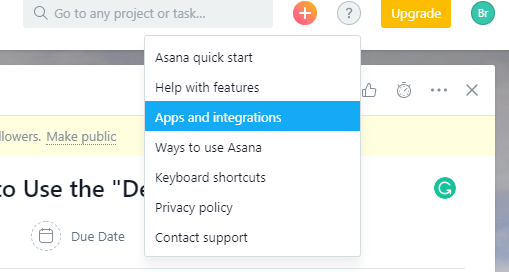
#9. Connect with Loom
I absolutely LOVE this integration! I use Loom for all videos, whether it be a tutorial on Honeybook or a simple 5-minute explanation of how to add SEO to a blog post in WordPress. Recently I used Loom to send a short video to one of my wedding clients who was having trouble using Pic TIme to access their gallery. Then, I went into Asana and saved this video to my tutorials board. That way, the next time a client has trouble with Pic Time, I can simply copy and paste the video from Asana into a message. Going along the same lines as all the other items above, do the work once and have the resource to use forever.
To use integrations in Asana, simply click the question mark in the top left corner of any page and scroll down to “Apps and Integrations”
#10. Assign Tasks Within a Template to Team Members (But – Don’t Assign Due Dates)
When you copy (i.e. duplicate) a project in Asana, you have the option to select include “assignees”. If you know you will be working with the same team members on this new project, I highly recommend checking this box. That way, you won’t have to go in and manually assign tasks to team members everytime you duplicate a project. The work is automatically done for you. And one last note, don’t assign due dates. You can do that after once you know what your timeline is for the new project!
Getting used to Asana and ALL of the features it offers can take time. I highly recommend using their online help center and quickstart guide if you are just getting started using this for your businesses’ task management. Their tutorials are easy to follow and give you step by step instructions for implementing many of their amazing features.
To learn more about Asana or sign up today, CLICK HERE!
And, if you would like to read more from Laura Lee Creative about getting started with Asana, check out this blog post: Getting Started with Asana for Task Management


")


+ show Comments
- Hide Comments
add a comment