


")


Task Management Bliss for Creative Businesses
When I first started my business five years ago I remember the ridiculous “task-management” systems I had in place. My organization of thoughts and to-dos consisted of post-it notes all over my desk, a myriad of different notebooks with random lists labeled “To-Do” “Urgent” “Immediately Do” “Do-Later” and “Done”. All these lists had a multitude of different projects on them – from designing my website, to client projects, to editing, to laundry and more.
It was complete chaos. And then on top of that mess, I’d of course also have a running list of things to do on the “notes” section of my phone. Now I wonder how I ever got anything done back then!
About 2.5 years into business I discovered Trello, a to-do list management system that helps you organize your to-dos in boards across different projects. It worked great for a while, but it was missing some of the capabilities I wanted for certain projects. A friend of mine had been urging me to try Asana for quite a while, so I finally gave it a go and have never looked back.
Today, I have no idea how my business would run without my combination of Asana and HoneyBook.
Pro tip: Since HoneyBook recently implemented the ability to create workflows in your workspace, and built a task management tool, I use HoneyBook for any client related tasks, and Asana for all my internal tasks that have to do with running a business! (Blog posts, newsletters, marketing, website updates, client gifts, etc.) I also use Asana to house my procedure manuals for the different aspects of my business and my different workflows.
So you might be asking… “Laura, what the heck is Asana?”
Glad you asked!
Asana is a FREE project and task management application for businesses (or individuals!). There are an infinite number of ways to use it for your work, and the cool thing about it is- you can set it up any way your brain works. There is no right or wrong way to use it, but today I’m going to go over the basics of how to set it up, how it’s organized, and how I use it for my business in hopes you can glean some insight on how you can start utilizing it for your own!
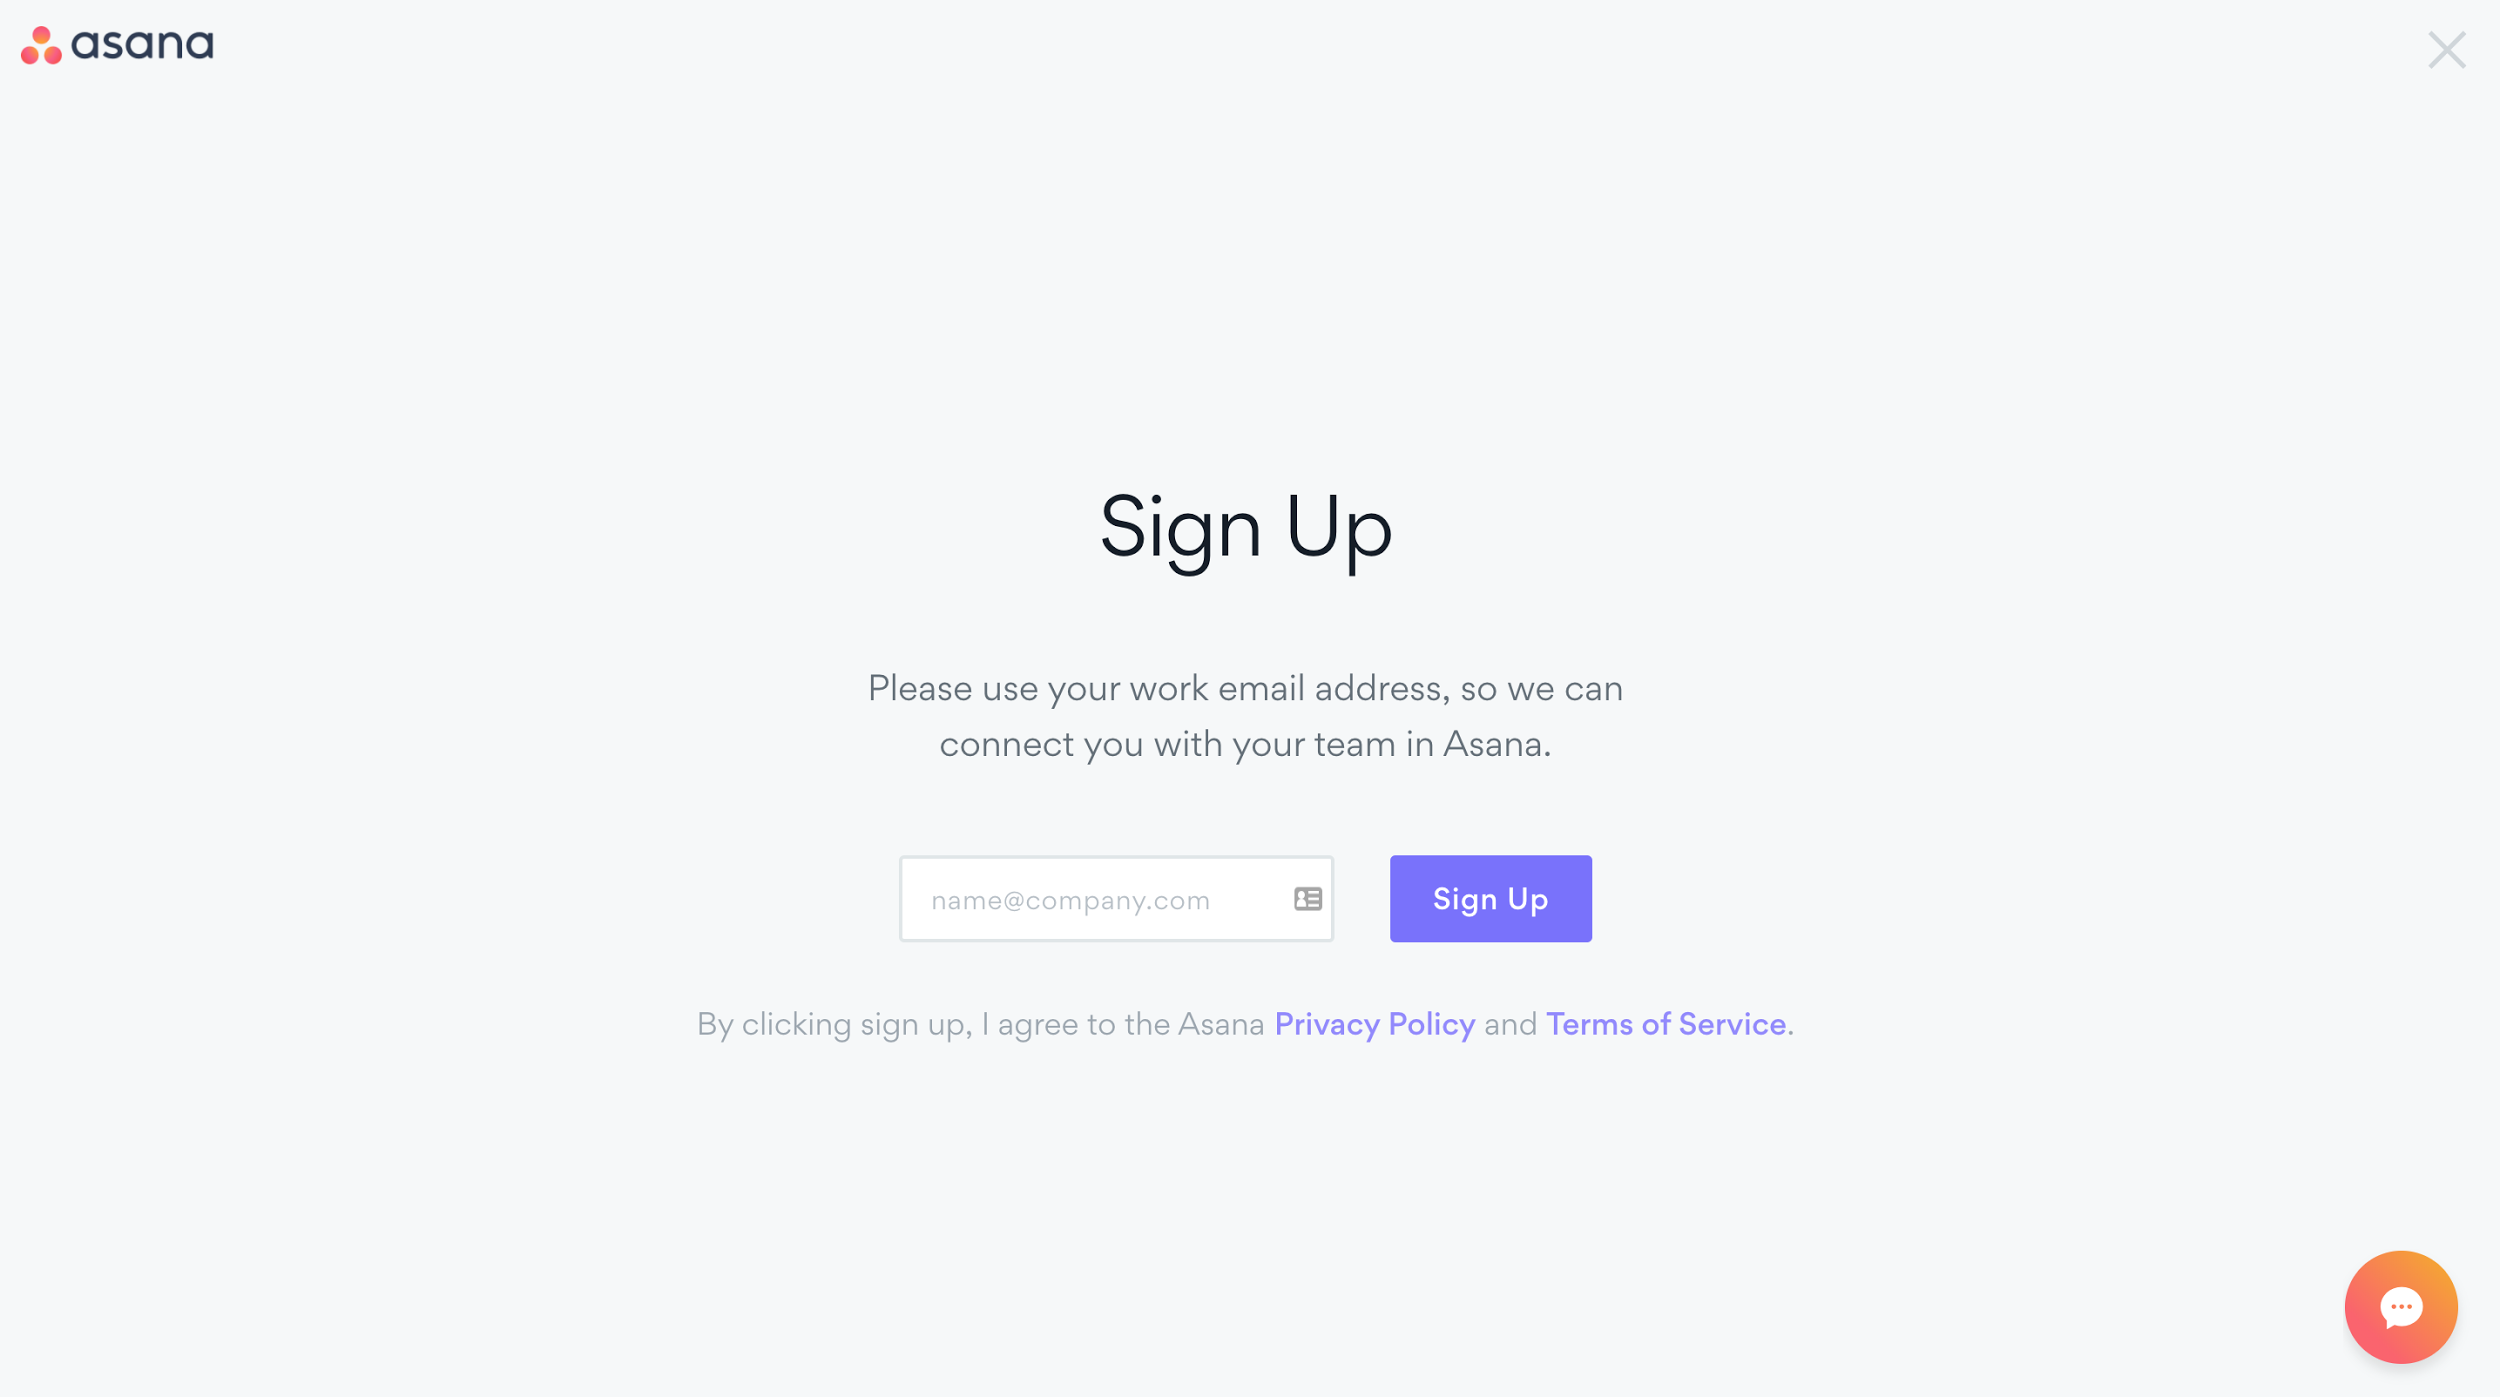
1. Signing up for your free account.
To do so, simply go to www.asana.com and click sign up! Asana will ask you to use your COMPANY email so that you can properly create an organization which I’ll go over in the next section. It’s important here to use an email that doesn’t end in gmail.com or yahoo.com or any other extension. You want to use something such as hello@yourcompanyname.com.
2. How Asana is Organized
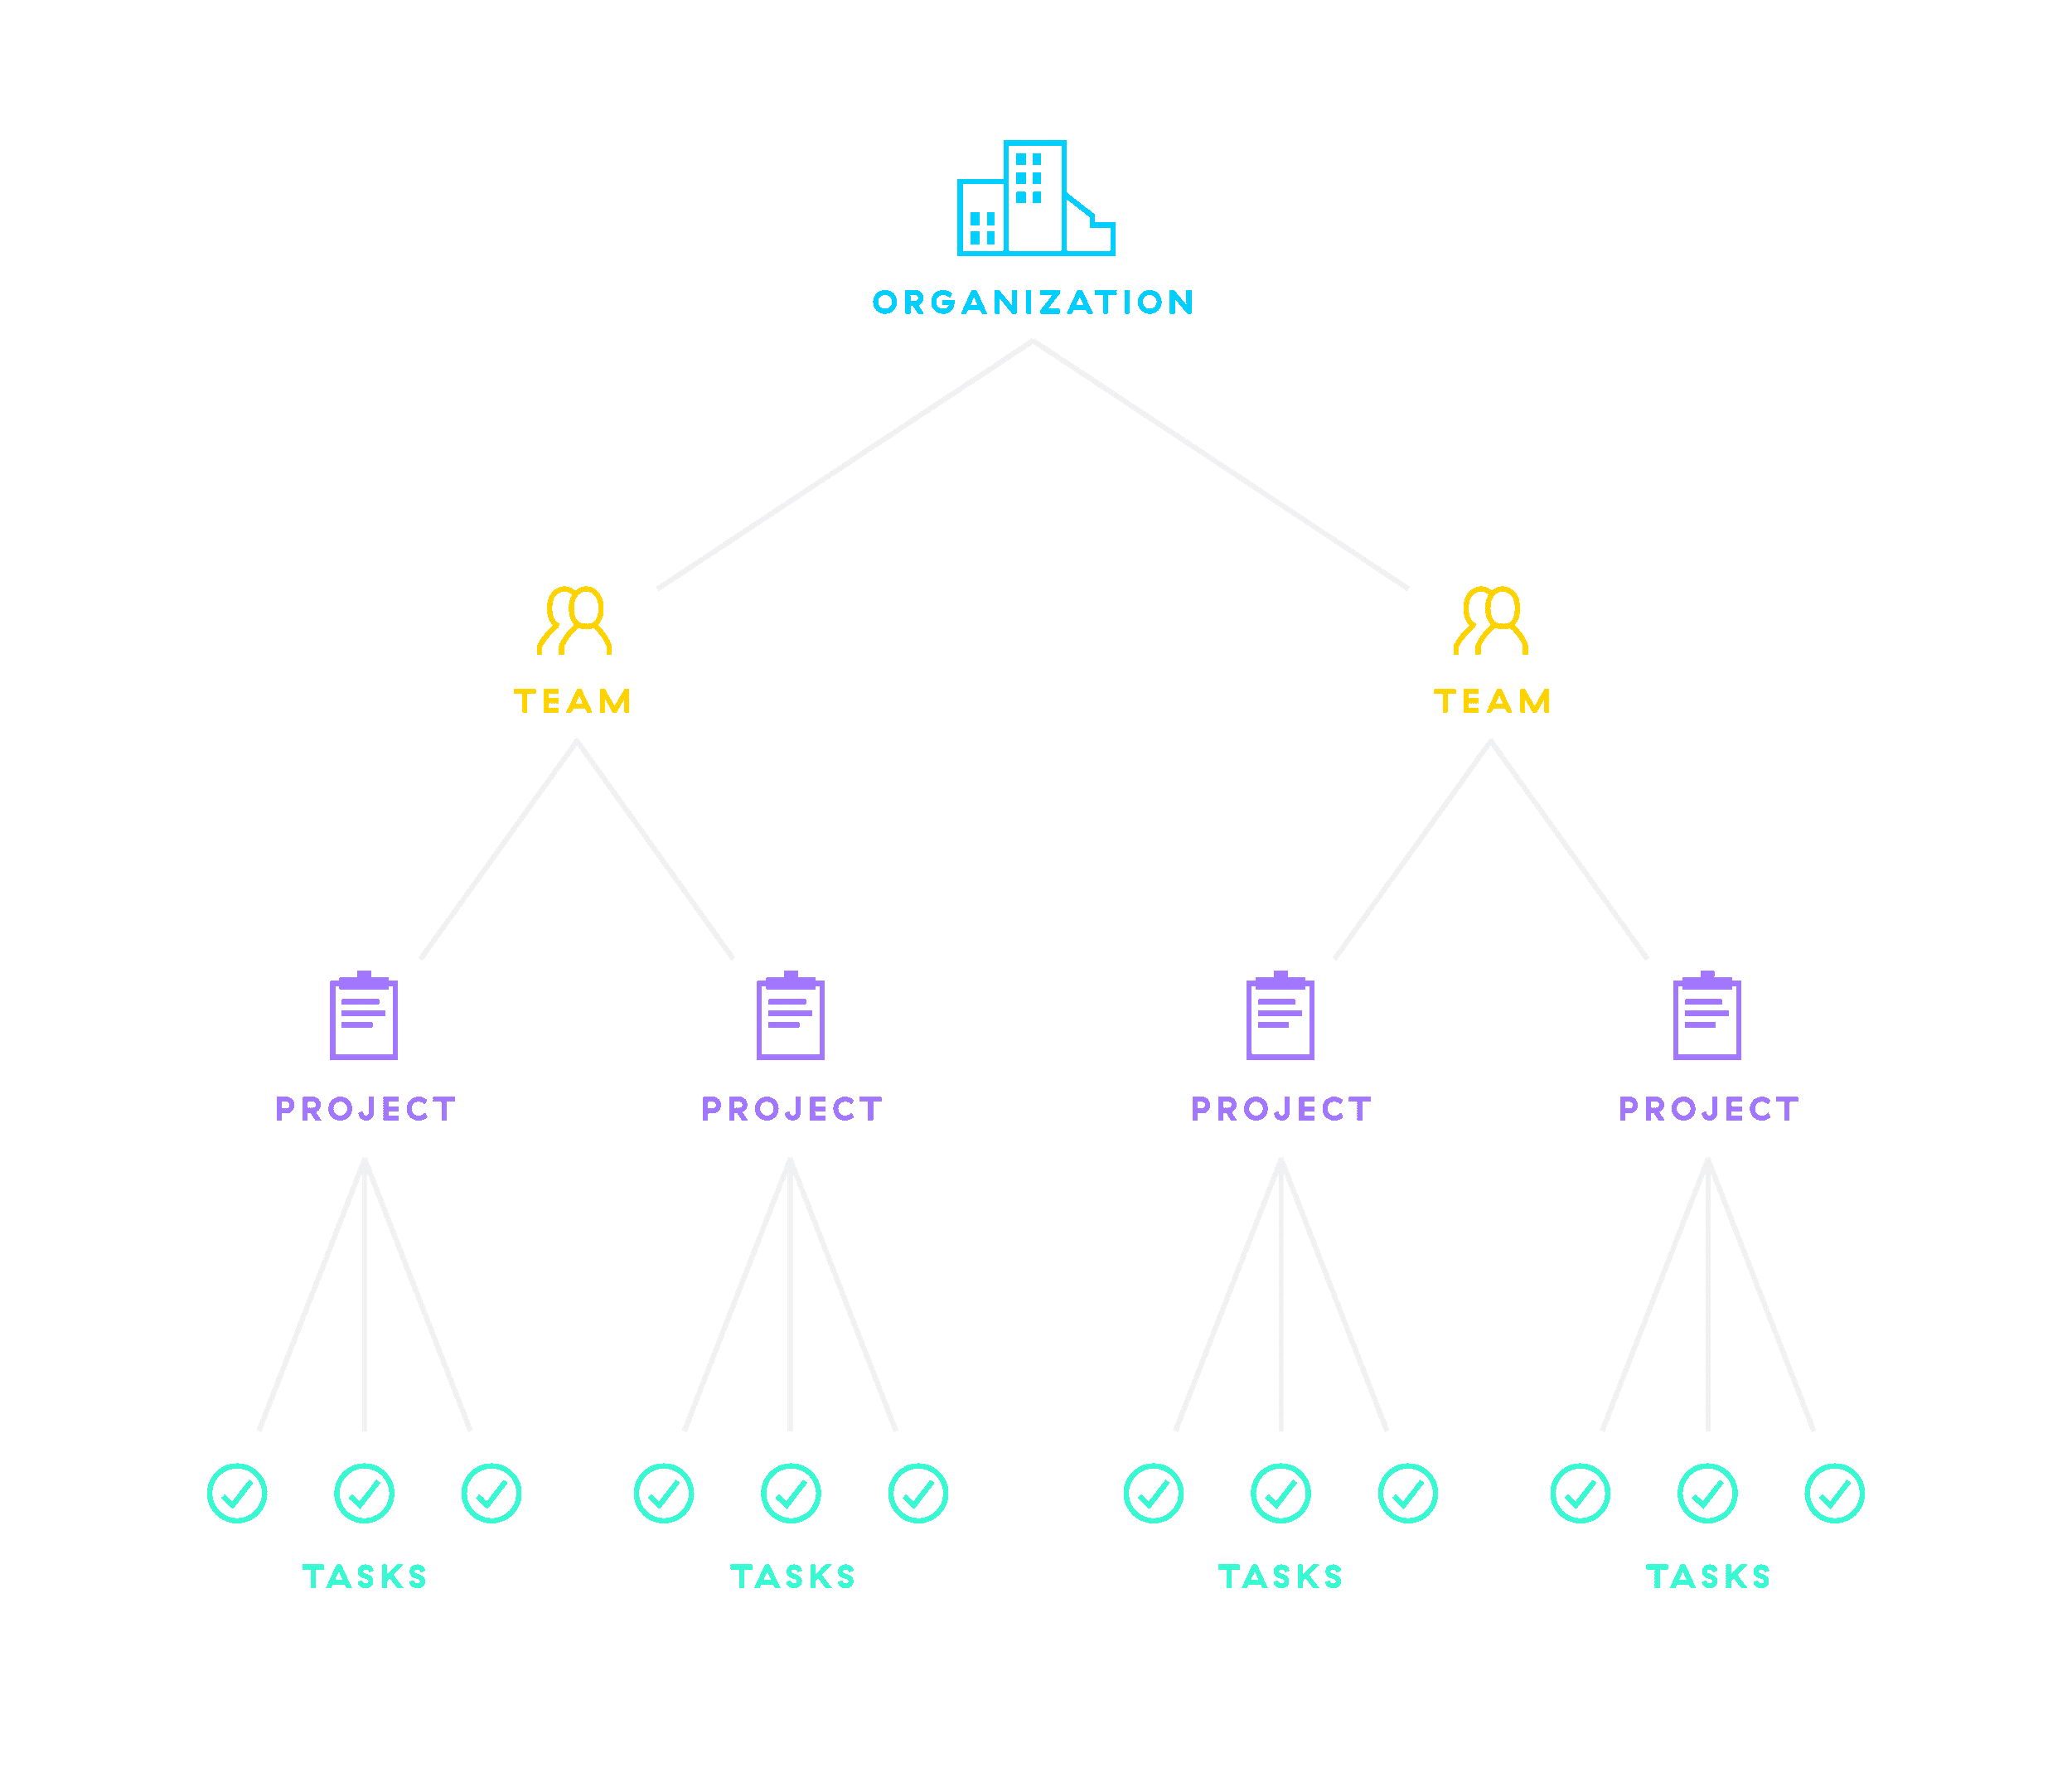
Once you have your account set up, the first thing you need to know is how Asana is organized. There’s a hierarchy to it’s abilities and the way it’s set up, so let’s do a quick overview of that now.
Within Asana, there is an organization, teams, projects, tasks, and subtasks.
Here is an excellent graphic of how Asana is set up. (Source: Asana)
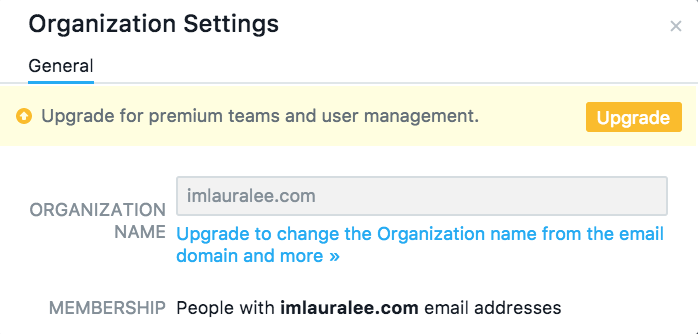
3. Organization
Your main “hub” is called an organization. This is what you will want to connect your business email to, so that you can keep all projects and teams within your organization together. This is where all your employees are connected in a single place. And if you don’t have employees- no worries! Organization party of 1!
For example, my organization is “imlauralee.com” and I had to sign up with my email hello@imlauralee.com. Within this organization are all of my teams, projects, tasks, subtasks etc.
4. Teams
Within your organization, you can create different “teams”. Teams are groups of people within your organization working together on a collection of projects. It’s completely optional to set up multiple teams if you’re a solopreneur, but I personally like to have different teams for the different areas of my business. I think of them as different “buckets”.
In my business, since I’m running Laura Lee Photography and Laura Lee Creative, I have a lot of different teams. I can add team members to each team individually, so that my assistant (who does mostly things for Laura Lee Creative) does not need to have her account bogged down my photography projects.
For my business I have teams for:
- Goals
- Home Base
- Laura Lee Creative
- Laura Lee Photography
- Albums
- Educational Courses (that I’m taking)
- Templates and Workflows
- Mentoring Sessions
- Personal
- Tuesday’s Together
If you’re a solopreneur, examples of teams might be:
- Content Creation
- Goals
- Administrative
- Client Projects
- Home Base
- Templates and Workflows
Once you have your different teams set up, you can hit the little plus button under the team name to add team members that will be working on those collections of projects with you.
5. Projects
Within your teams, you can create an infinite amount of different projects where you store all the tasks, subtasks, due dates, procedures, notes, and assignees in order to bring your ideas from idea to completion.

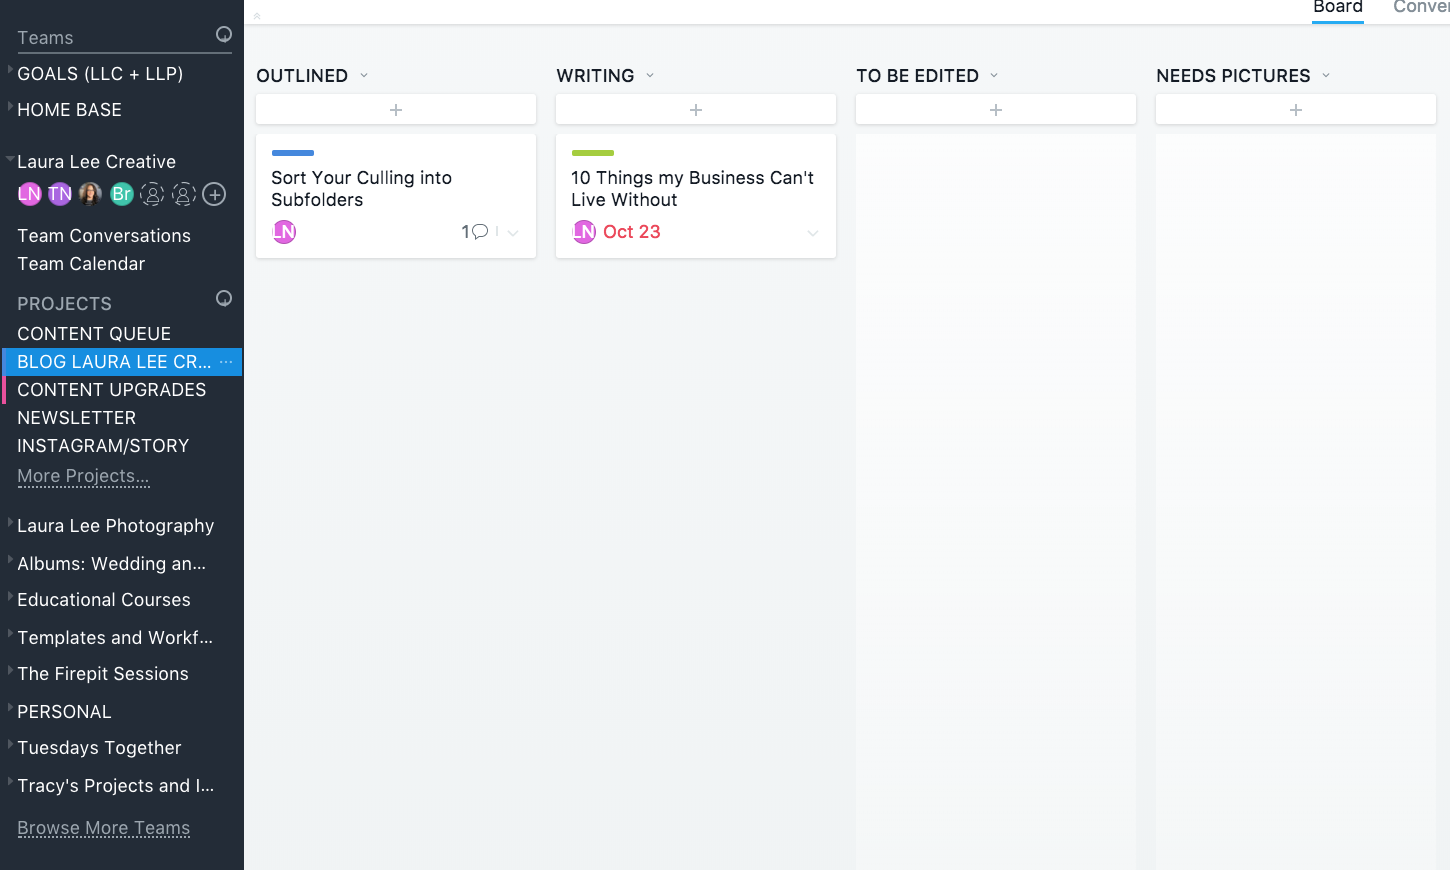
As you can see on the left hand sidebar, under the Laura Lee Creative “team” I have multiple projects:
- Blog
- Content Upgrades
- Newsletter
- Instagram, Instagram Story
- Facebook Live
- And so on…
And projects can be set up any way your brain works! For examples, projects can be set up with board layout, or list layout, and can have tasks, subtasks, tags, and more.
Board Layout | Laying your project out in a board allows you to use what is commonly known as the “sticky-note method” where you can move your tasks or notes across columns for a visual overview of all the tasks within your project.
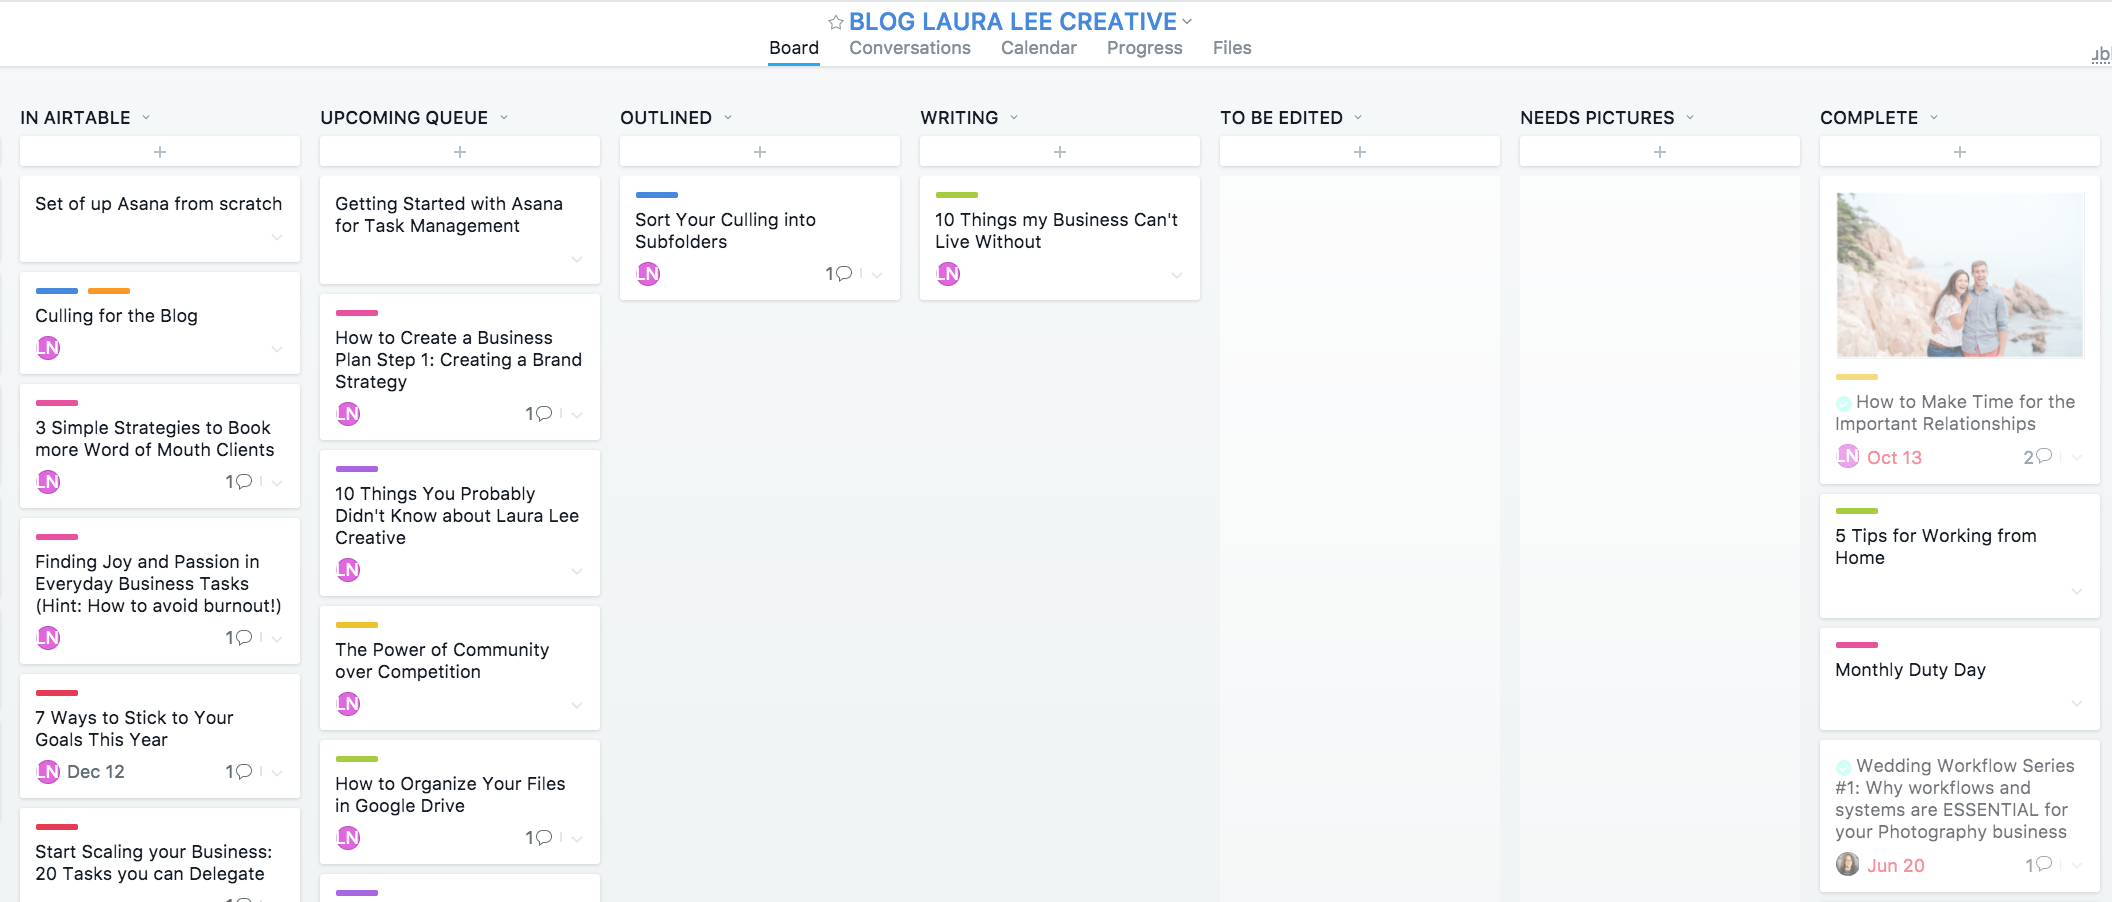
The board layout is great for projects that would have tasks moving down a pipeline. I use the board layout for projects such as:
- Blog Content
- Newsletters
- Launches
- New Website Design
This is also a great view for creatives who are more Type B and visual learners.
Pro Tip: When you create a new project, Asana will ask you if you want to use Board or List view for the project. I’d think through how you want this setup before creating the project, because you cannot change it once it’s set up!
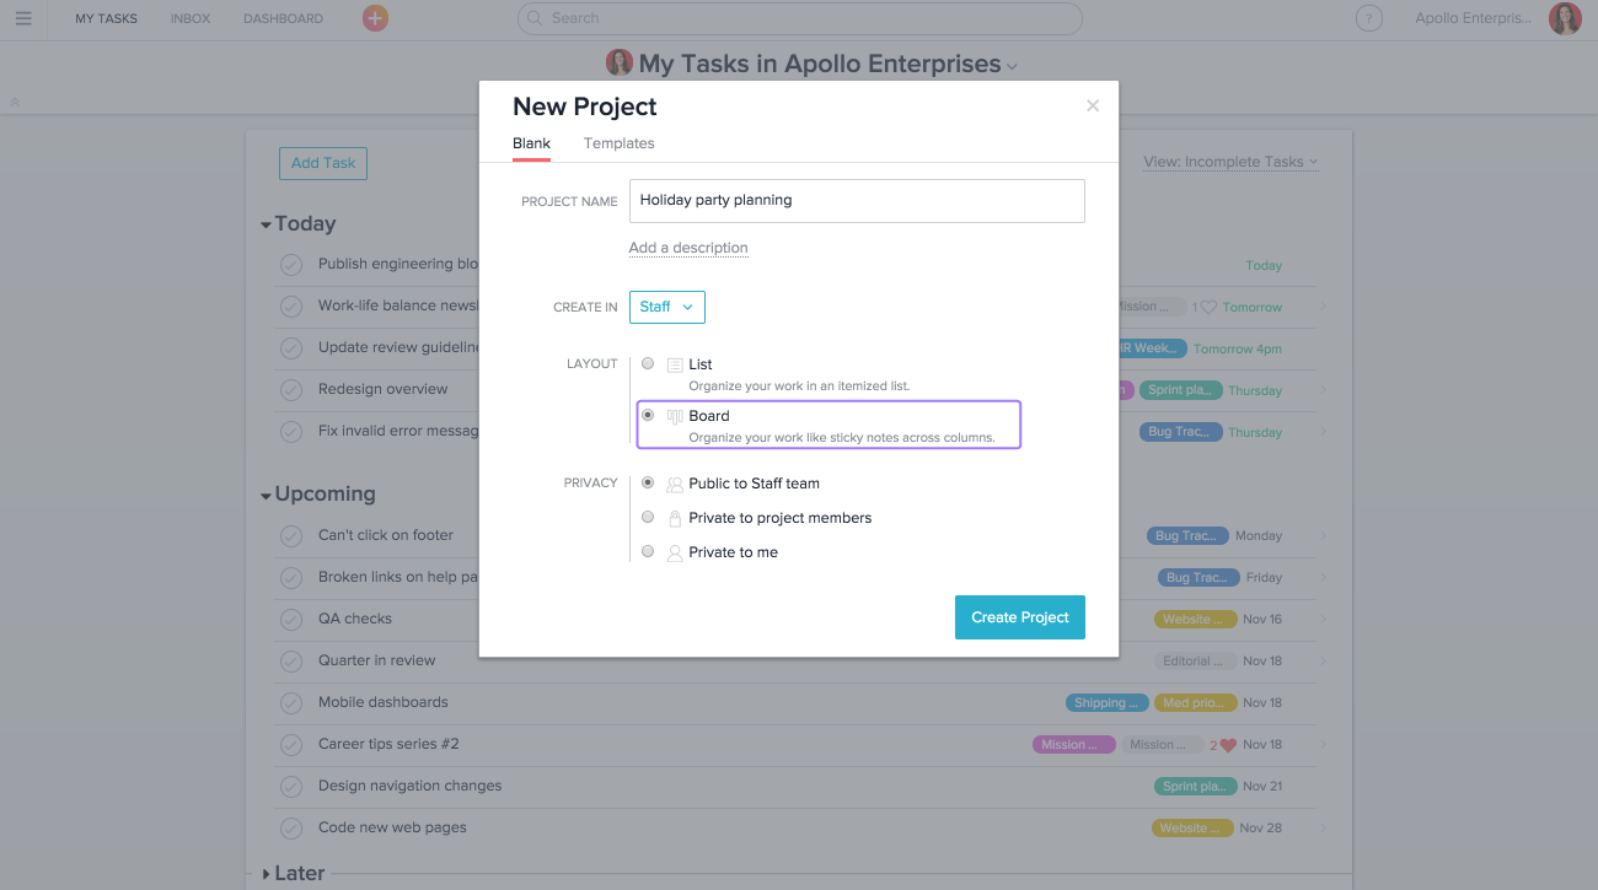
Image Source: Asana
List Layout | If your project does not need a visual pipeline, and would work better in list format, Asana allows you to create a project in list view, and it literally just looks like a piece of paper (but with way more robustness such as writing tasks, due dates, assignees, subtasks, and descriptions.)
List view is great for:
- Workflow Templates
- Client Projects going through a workflow of tasks that are one after another and not necessarily moving down a pipeline of “project stages”
- Client Gifts
Here’s an example of how I use list view for my client gifts project for my photography clients:
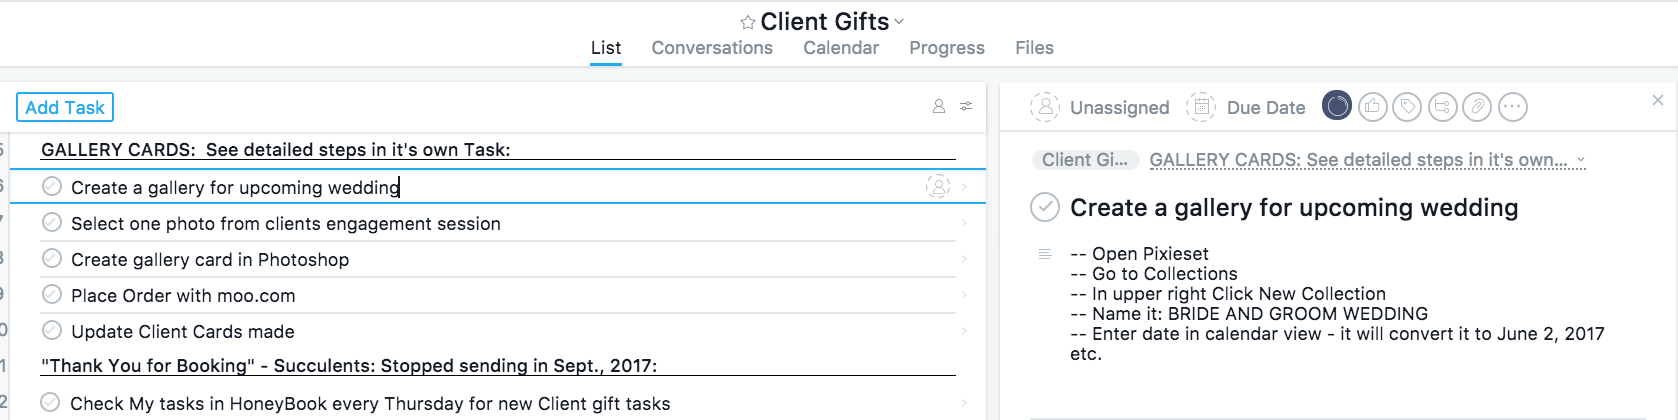
On the left, you will see all my tasks, and on the right, you will see the description for the highlighted task.
You will also notice that there are lines that are bolded. These are section headings.
Pro tip: To create a section heading, write your text and then put a colon (:) after it. This will make it bold and underlined, and then your tasks can go under it.
6. Tasks
Once your project is created, it’s time to start adding all the moving parts you need to complete in order to finish the project. In Asana, these are simply called tasks!
Within each and every task, you can assign it to a team member, add a due date, add a colored tag, attach files, comment with other team members, and write task descriptions.
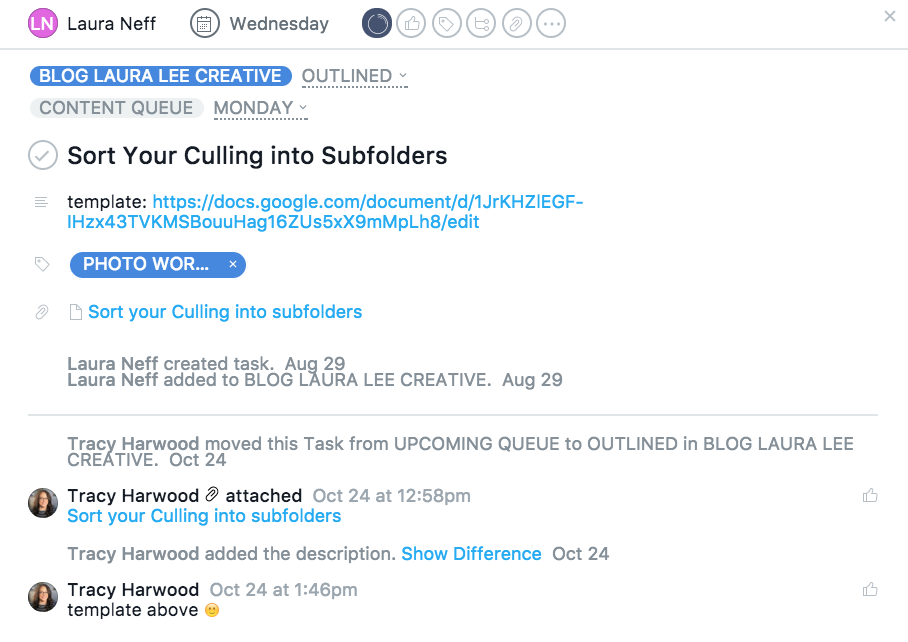
You’ll see on this task above (which is for a blog post I need to write) I have assigned the task to myself, set a due date, tagged it per my blog category, and my assistant Tracy, commented that she attached a file for the google doc template (which you can see attached in the blue text).
7. Subtasks
Subtasks are any small tasks you need to do to finish the larger task.
For example, if my tasks is to complete the blog post used in the example above, my subtasks might be:
- Outline Post
- Write Post
- Edit Copy
- Design Graphics
- SEO keyword research
- Format Post
- Promote
And to be honest, I break those down even more! For blogging specifically, those above subtasks are actually my subtask sections, and then I break down tasks in each section, like so:
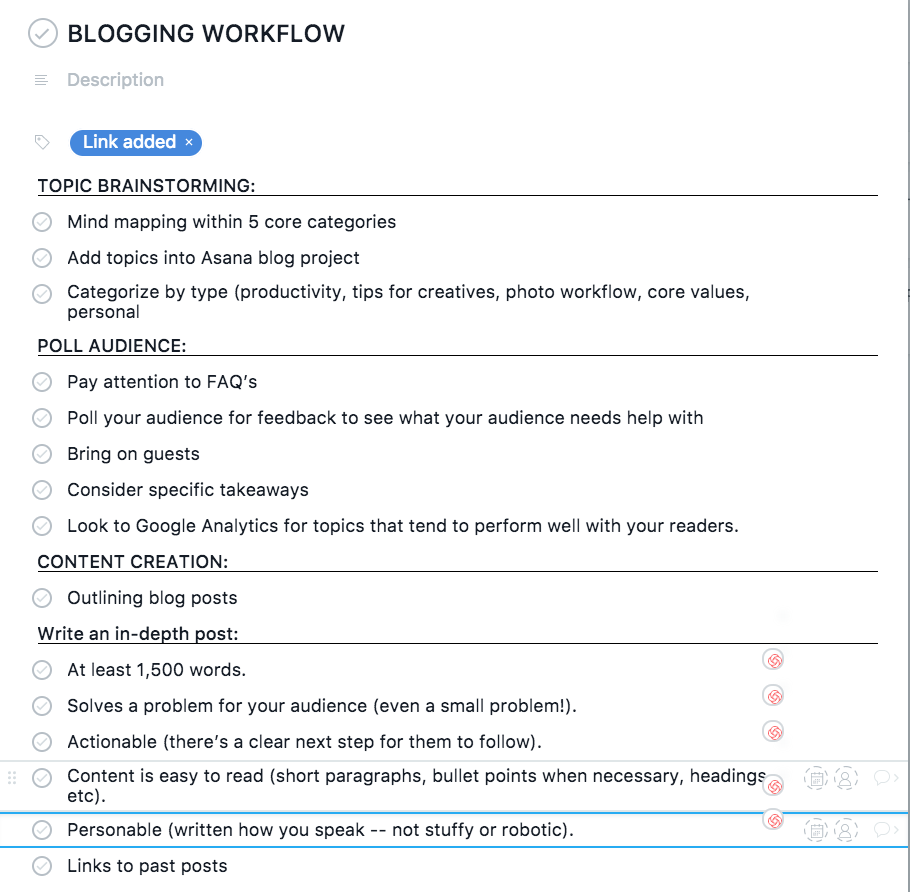
As you can see- even the subtasks can have assignees, due dates, comments, etc. But you cannot add descriptions to subtasks, so I would generally only use subtasks as the actual mini steps I need to do to complete a task that don’t need much description (like the ones in the image above)
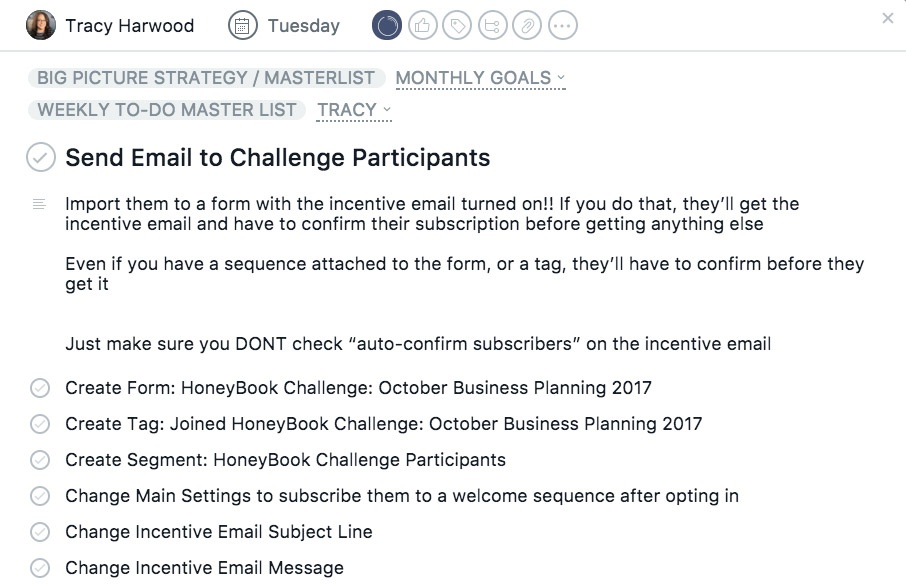
However, generally, I use tasks when assigning things to my team members, because I can describe exactly what I need them to do in the description section, and then I might use the subtasks section to further break down what needs to be completed.
Example: One of the recent tasks I assigned to my assistant was to send an email out to everyone who joined the HoneyBook challenge. Before sending that out, we had to import subscribers, write an email and subject line, and do a lot of formatting and organization in Convertkit. So all of those things became the subtasks in order to send the email.
––––––––––––––––––––
So there you have it! This is a (very in depth) overview of how you can get started with Asana! If you have questions on how I use it specifically, or how you can use it for your own business, just comment below or post your questions in The Fireside Tribe Facebook group!
I think this will be the first of many Asana blog posts, so I’ll be happy to answer any specifics on it in the group or in future posts! I hope this helped you glean some useful knowledge on how you can use it for our own business!


")


[…] P.S. Not using Asana, but you’re curious about it? Click here to read my post on Getting Started with Asana for Task Management […]