


")


“How do I organize my client workflow?” is a question I get A LOT. “Where do I even begin?” is another one. So today, I want to tell you exactly how I organize my client workflows!
My workflows have gone through many phases from where they are stored to how they are written. I have spent countless hours perfecting their application. They’ve gone from a piece of paper (covered in different highlighter colors) to a Google Doc to an automated checklist in my CRM, Honeybook.
These phases have all been very necessary for me as they have taught me more than I ever could have imagined about maximizing efficiency with my business systems.
I know many of you have a general workflow written down for how you complete one, five, or all of the steps of your client process. Having a workflow checklist written down, anywhere, is a great start! But if it is not automated, you are not using it to its full potential. Today, I want to share how I organize my client workflow to maximize efficiency and save time!
WHY [Automating your workflows can save you time and sanity…and sleep!]
Automating your workflow and syncing it with your various clients’ project dates will change everything! It takes the guesswork out, giving you back a few of those hours of sleep you’ve lost thinking, “did I forget something today!?” In Honeybook, I can access ALL the tasks that I have due for that day in one place with their task management tool.
As you can see here, I have tasks for three different projects loaded on my task management page. It also shows me that I have 30 tasks due today for my various client projects. It’s a to-do list done for you!
WHEN [Applying workflows to my client projects]:
As soon as a new inquiry comes through, I apply the appropriate workflow to their project. To start, I usually apply the “inquiry” workflow which only has around 15 steps. I don’t need to activate the full wedding workflow just yet! I want to make sure they book first. I follow the steps in my inquiry workflow and as soon as the couple books, I apply the full wedding workflow.
Each of the steps I need to take to secure a new inquiry is outlined for me in Honeybook. When a new inquiry comes through, I read the inquiry, confirm the date on my calendar (which Honeybook automatically syncs to!), edit my “new inquiry email template” and boom! The new client process has started.
HOW [Organizing my client workflow – the basics]:
Before I start building my client workflow, I make sure I have EVERY task or action item written down for that particular workflow. After I’ve listed the tasks, I organize them based on when they will happen in the workflow. Then, and this one is important, I make sure I have ALL of the supporting documents for that workflow created before I even start adding the steps to my CRM.
Think – proposal templates, contracts, questionnaires, email templates. Everything that goes into the workflow needs to exist before you can start organizing and implementing!
I organize my workflows in chronological order (e.g. from the first inquiry email to the final thank you email}. I use the tools in Honeybook to set due dates based on the project date. As you see below, I send the couple a proposal, 0 days after activating the workflow.

Then, later on in the workflow, you will see that certain due dates are organized based on their distance from the project date. The example below is the Wedding Day Questionnaire, something I send 120 days before their wedding date (aka. The project date).

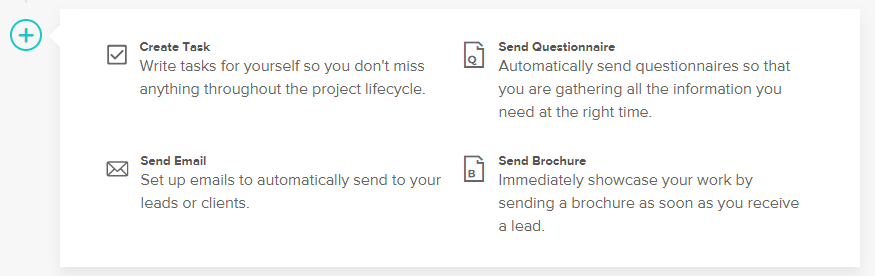
Once you have everything ready to plug into the workflow, the actual “creation” and organization process is easy. Select the type of action item (see below for Honeybook’s action item types), write out the description of the action item, include the necessary supporting documents (if applicable), and hit next. You are on to the next one. In Honeybook, you can also move tasks around as needed to make sure they are in the order you want them to be.
Now that I’ve touched on why, when, and how I organize my client workflow, I want to give you a few examples of the actual workflows I use for both of my businesses. This is just a snapshot of what the workflows are titled. The number of steps in each of these workflows ranges from 15 – 136 steps, depending on the details of each workflow.
To learn more about exactly what is inside these little lifesavers, you will have to hang tight. Keep reading all the way to end, I have something exciting to share with you!
The Workflows I Use for Laura Lee Photography:
Wedding & Engagement Workflows
- Wedding Inquiry
- Wedding Workflow (Booked)
- Wedding Album Workflow
- Engagement Session (No Wedding)
- Engagement Session (With Wedding)
Other Photography Workflows
- Brand Inquiry
- Brand Photography Workflow (Booked)
- Portrait Session
The Workflows I Use for Laura Lee Creative:
- Mentoring Session Workflow
- System Strategy Call
- Workflow and Systems Client
- Prospective Mentoring Client
*All of the above client workflows exist in my HoneyBook (I created them). To start a free 14 day trial of HoneyBook click HERE. If you like it, that link will give ya 50% off your first year!
Additionally, there are many resources in the Laura Lee Creative Shop for workflow templates! Click here to peruse the right one for you!
Using Asana for Workflow Templates
I’ve been talking a lot about Honeybook here but I wouldn’t be doing my entire workflow organization process justice if I didn’t mention Asana, my task management software for all the other things in my business + the home of my operating procedures.
Within Asana, there are different levels of hierarchy: teams, projects, tasks, and subtasks. I have an entire team dedicated to templates and workflows which ultimately house the workflow checklist and the procedures for each and every task within the workflow.
Each of my workflows is its own project, each project has tasks, each task has a description.
*Important note that’s written down below but bears repeating here: I do not use Asana to perform the workflow. Honeybook is the software I use to sync and automate each of the action items in my workflows with their respective project dates. My workflow templates live in Asana simply as reference materials, not as a place for implementing and checking things off.
Now that that’s cleared up, here’s a few examples of my team, projects, tasks and their descriptions.
Team: Templates and Workflows
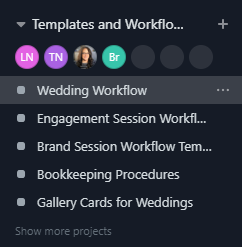
Individual Projects (See Above)
- Wedding Workflow
- Engagement Session Workflow
- Etc.
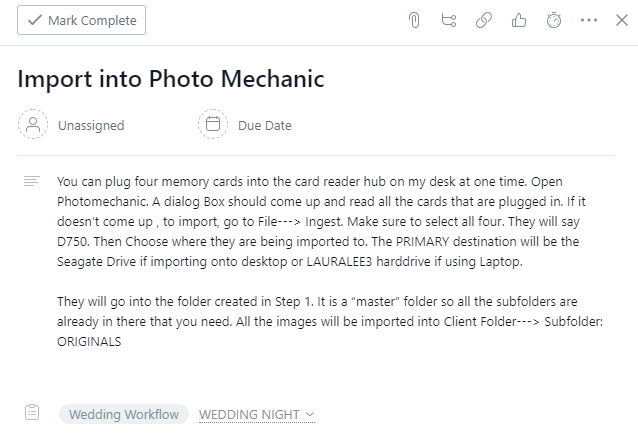
Tasks: Day After Wedding (Example)
*Note, no due dates are assigned. I only use this as a reference tool.

Descriptions: Import into Photo Mechanic
Here I outline the exact steps I take to import the photos into Photo Mechanic.
I use Asana for my workflows to accomplish two things:
- To store all of my procedures, full tasks descriptions, and workflow templates in my Asana team titled “Templates and Workflows”.
- As a point of reference, in case I need to train someone new on my team or if I forget the detailed steps of a task during the offseason.
One VERY Important Note (Again): I do not use Asana to perform the workflow. Honeybook is the software I use to sync and automate each of the action items in my workflows with their respective project dates. My workflow templates live in Asana simply as reference materials, not as a place for implementing and checking things off.
And, that’s it! Organizing workflows in a nutshell!


")


[…] How I Organize My Client Workflows […]